Image Map
Showing posts with label recipe. Show all posts

Friday, September 23, 2016

Favorite Fall Desserts!

Fall brings so much happiness. Colorful leaves, crisp air, bonfires, cooler nights and DESSERT! Lots and lots of dessert. I wanted to narrow down a few of my faves for today's post! None of these are healthy, but hey, life is all about balance, am I right?

1 || One of my absolute favorites that I found from Lisa's blog a few years back (and have made it about 3 times since then) is the amazing Pumpkin Pull Apart Bread. Holy wow, you guys. so darn easy, and it goes QUICKLY! So be sure to be the one to pull it out of the oven so you get first dibs.

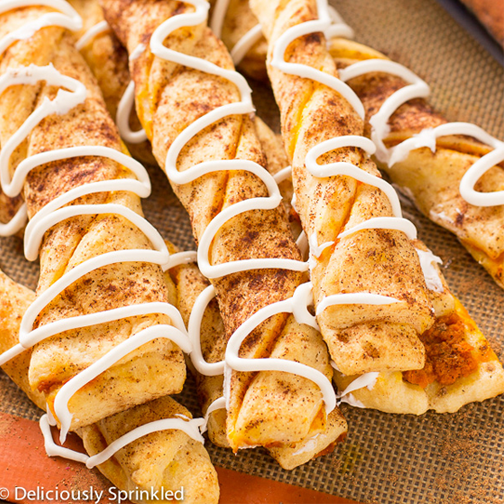
2 || Pumpkin Pie Twists. These look like the EASIEST, most delicious little snacks ever! How perfectly Fall themed, too!?

3 || Cinnamon Apple Crumb Cake. YUM! I feel like Pumpkin always "takes the cake" when it comes to this time of year, but what about apple?! I love apple flavored things (give me all the apple pie, and all the warm cider)!!

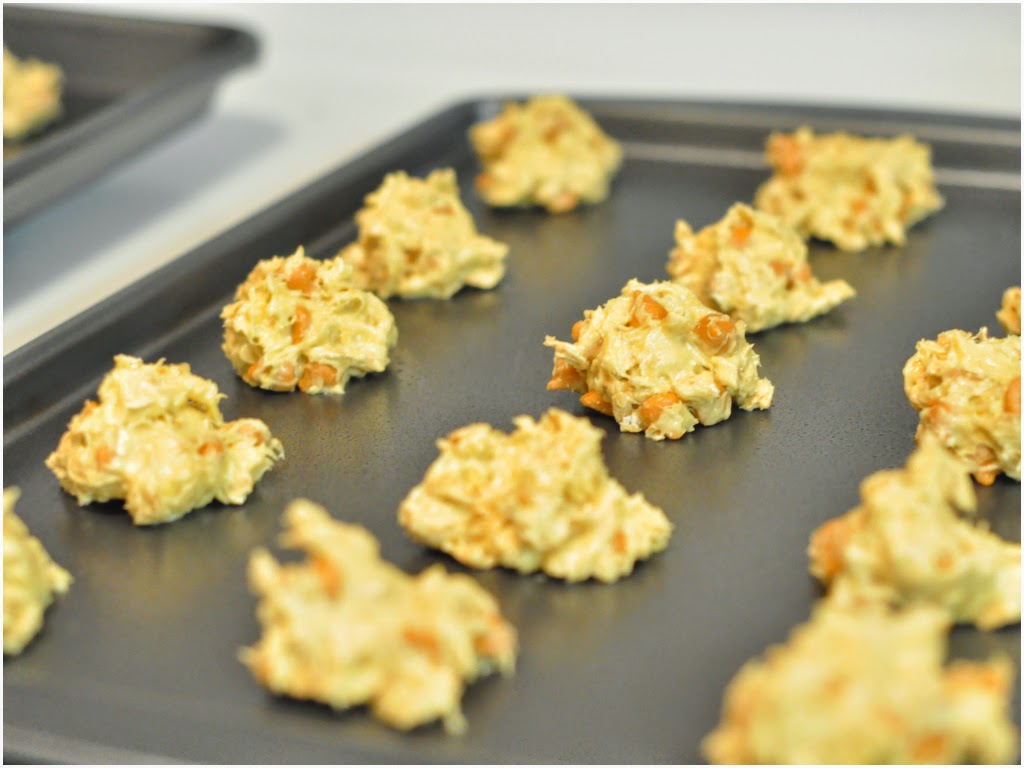
4 || Oreo Acorn Balls. I think I like this one best because its so darn cute. Seriously, how fun would these be to make for a party/random get together with friends?!

5 || Slow Cooker Caramel Apple Cider. You know I had to include a drink because to me, drinks can be just as much of a dessert as food. That's basically how I look at Starbucks! Dessert, not caffeine, ha!

A few other favorite Pinterest finds? Reeses Peanut Butter CheeseballCinnamon and Spice Sweet Potato Bread, and these adorable Pumpkin Cupcakes! I hope you guys enjoy! Let me know if you try any of these and what you thought!

Hope everyone had a great week and has a fun weekend ahead of them. We have a wedding tomorrow, and we're very much looking forward to the Bengals game on Sunday! WHO DEY!? I'd also like for the temperatures to get with it, and cool the heck down. I'm ready for REAL Fall weather. My scarves are just dying to see the light of day!

Wednesday, March 9, 2016

Taco spin off.

Last night my mother-in-law came over and we spent hours upon hours planning details for Erin's shower that we're throwing next month. We finally organized all the chaotic ideas we had floating around in our brains, and came up with a serious amount of adorableness. My heart just can't wait to put all these ideas into motion!

Before we both whipped out our planners, notebooks, sharpies and magazines, I whipped up the yummiest taco themed meal and guys, it made me PUMPED for warmer weather. Now I'm basically begging Caleb to let us get an outdoor patio set so we can enjoy these warm nights (seriously, it was MID 70's last night!!!).

Pre baking:

Post baking: yes, I realize its terrible quality, but I didn't want my family judging me for taking photos of my food, so I was quick about it. They don't blog, remember? ;)

Anyway, I know that photo sucks, but I cannot wait to tell you how easy and delicious it all was!!!! You know I get easily intimated by main courses, but this was about the easiest thing I've ever made.

Easy Taco Bake
-1 tube of regular crescent rolls
-1 lb lean ground turkey
-3/4 cup favorite salsa
-Taco seasoning packet
-1 cup shredded cheddar cheese

Step one: preheat oven to 375 and line your pie pan (8-10") with the crescent rolls.
Step two: cook your ground turkey (or beef) like usual.
Step three: drain the meat, stick it back in the skillet and add both your taco seasoning and salsa.
Step four: once its all mixed in, spoon it into the pie and cover it with cheese. Bake for 15-18 minutes until the crust is golden brown and cheeses melted.

Frito Salad
- 2 cans sweet corn, drained
- 1/2 red onion diced
- 1 diced green pepper
-1 cup light mayo (I used a little over 3/4 and it was fine)
-2 cups shredded cheddar cheese
-1 bag of Chili Cheese Fritos

Step one: mix every ingredient except Fritos in large bowl
Step two: if you are serving it right away, add Fritos last. If not, stick it in the fridge and add Fritos right before serving.

Don't even get me started on this Frito corn "salad" thing. I could've finished the entire bowl on my own. I'm so excited that I now have a go-to summer dish for parties, etc.! I hope you all like it, too! Enjoy your hump day!

Wednesday, August 5, 2015

These are like magic. No literally.


One of my all time favorite desserts growing up were Magic Cookie Bars. I can remember making these with my Nanny at a crazy young age. They are one of the EASIEST things to bake in the entire world, but TASTES out of this world. I'm sure you already know the recipe, or have at least heard to these, but in case you've never had these... RUN, don't walk, to the nearest grocery store and pick up the following ingredients;

1/2 cup melted butter/margarine
 1 1/2 cups graham cracker crumbs
1 (14oz) can of sweetened condensed milk
1 1/3 cups flaked coconut
1 cup chopped nuts
1 cup semi sweet chocolate chips/morsels
1 cup butterscotch chips/morsels (I added these instead of 2 cups chocolate chips, but that's just my preference)

-Preheat the oven to 350 degrees (but only 325 if you're using a glass dish) & coat 13x9" pan with non-stick spray.
-Combine the graham cracker crust and the melted butter, then press it into your pan...no worries, it should be a thin layer!
-Pour the condensed milk evenly over the crumb layer, then the morsels, coconut and nuts. Then press into the pan lightly with a fork.
-Bake for 25 minutes, or until golden brown. Let cool and then ENJOY!

Then if you feel up to it, make your sister in law take random photos of you while doing all of the above ;)

PLEASE tell me you've tried these before?! & if not, tell me when you do, and what you thought!!! Happy hump day!!

Tuesday, April 29, 2014

You're gonna want to bookmark this. {yum}

Last week, I mentioned wanting to push myself and actually cook again. I'm embarrassed to say that my definition of "cooking" is throwing plain chicken in the oven, and making vegetables in the skillet. No recipes, no fancy ingredients, and definitely no spices. I'm also embarrassed to say I can count on one hand how many intricate meals I've made since we've been married (meaning, following a recipe)...so I decided it was time to dive deep into my Pinterest boards and find me a winner!

{insert most amazing dinner ever from my favorite new food blog and who I give full credit for this recipe; Half Baked Harvest}


You will need;
2 cups cooked quinoa
1 cup of your favorite pasta sauce
2 tablespoons tomato paste
1/3 cup heavy cream
1 cup mozzarella, divided (we used fresh rounds)
1/3 parmesan cheese
1/2-1 cup grape tomatoes, halved
1 large bunch of basil, cut into ribbons
1/2 teaspoon crush red pepper
1/4 teaspoon salt
1/4 teaspoon pepper


First, you'll want to preheat your oven to 350 (do that first -- don't be a crazy like me and forget until after your meal is ready to go in the oven to do that!). Then, you'll want to hit up both the tomato sauce and tomato paste over low heat in a large pan. Once warm, stir in heavy cream, parmesan, crushed red pepper, salt and pepper.


Once blended, remove from heat and add in the cooked quinoa. After, fold in half of the mozzarella and half of the tomatoes. Then chop up 6 leaves of basil and add those bad boys in too! Once its all combined, spray an 8x8 (you can also use 9x9) baking dish with non-stick spray and pour the entire mixture into the dish. Top with fresh mozzarella rounds (or shredded mozzarella) and the remaining tomatoes. Bake for 10-15 minutes, and then turn on the broiler for 1-2 minutes (or until cheese is golden). Once its done, add a few basil ribbons on top, then ENJOY!

I'm so excited to say it turned out amazing, like...I was actually so proud of myself!! I freaking used my BROILER! I didn't even know our oven could do that.

Please do yourself a favor and make this TONIGHT...oh and while you're at it, make every recipe from this blog, where I found this incredible recipe :) enjoy! 

Monday, April 7, 2014

Drool worthy cookies.

Yeah you read that. Let me introduce to you...BANANA BUTTERSCOTCH COOKIES!


Yeah, you're welcome.

All you need are 4 ingredients, and you probably already have them all. I literally can't remember if I've blogged about this recipe before, but you know what? If I have, twice can't hurt. These cookies are insane...and by insane I mean so freaking tasty I can eat 8 of them in like a minute.


All you need;

A box of yellow cake mix (any brand is fine)
Butterscotch chips
2 cups oats (I used whole grain)
3 large, very mushy bananas

Preheat your oven to 350 degrees. Get out a large bowl and mush the bananas together until they are at a paste-like consistency.

Then, add in the yellow cake mix. Only do a LITTLE AT A TIME, its a little easier to stir that way!

Add in 2 cups of oats (also do a little at a time), and to answer your question, YES its going to get very, very, verrryyyy thick! Like, you'll have a serious arm workout...I much prefer doing it this way so I don't have to spend 30 minutes cleaning out my kitchen aid mixer!


Last, add in your butterscotch chips. Use half the bag, or use the whole bag. Honestly, I use almost ALL of it every time!!


Once you have that all mixed up, place teaspoon sized (or just slightly bigger) portions on a non-stick cookie sheet. 


Bake for ONLY 12-13 minutes. No longer or the butterscotch starts to burn to the pan (trust me). Don't keep them in longer waiting for them to "brown" either, remember these are cake cookies and are supposed to be moist (ugh, that's my least favorite word...but I had too).


Once finished, remove from the cookie sheet and place them on racks to cool for 5-10 minutes! Once they are cool, you'll immediately want to place them in a sealed container to keep them soft!

This makes a ton of little cookies, so be hungry when you make these. Can't wait to see what you guys think!

Wednesday, February 26, 2014

SALSA FROM HEAVEN.

If you read my post last Friday, you probably saw a little snippet about how I promised a delicious recipe coming your way on some SALSA! If you know anything about me, its that I love Mexican food. The salt, the chips, the salsa, the queso...ahhh. So I knew when a friend sent me this recipe I HAD to make it.

Please, do yourself a favor and bookmark this right now.

Ingredients;
Dressing;
2 Tbsp olive oil
1/4 cup red wine vinegar
1 tsp salt
1/2 tsp pepper
Filling;
1 can black eyed peas
2 cups chopped tomatoes
2 cups fresh corn kernels
1 avocado, peeled & diced
1/4 cup red onion
1/2 cup fresh cilantro, chopped.

First, you want to start by whisking the "dressing" together. I would advise to use a little less red wine vinegar, but we loved it with the 1/4 cup, still!

If you're a newb at cooking/making anything (like myself), check YouTube to learn how to properly cut open, and cut out an avocado. Much to my surprise, it went fairly well!

Check your favorite cooking book for tips on how to cut an onion (I was pretty impressed with myself on this one).

Then you'll want to dice your tomato, pour in the black eyed peas, corn and then begin chopping up the cilantro...and take in that for just a moment, your kitchen smelled equivalent to your neighborhood Chipotle. Once all those ingredients are chopped and prepped, pour them in your large bowl on top of your dressing.

It should look a little something like this!

Now get in there, and mix 'er up!

You can drain it out some more if you want, but we left it as is. After that, you'll want to refrigerate the salsa for about 20-30 minutes to let it chill. Waste some time on Netflix, burn through a sitcom, and you're ready to enjoy this sweet salsa with a bag of your favorite tortilla chips! Next time we make this, we both agreed on more corn, and a little less vinegar. If you want my opinion on this dish? Make it! Like, yesterday. We shouldn't have, but totally ate it as our dinner one evening. #dontyoudarejudgeus

Although it was pretty simple, making this made me feel really accomplished. I'm loving all of your support on my journey to be more domestic. I have friends sending me recipes all the time, blog followers inviting me to their recipe Facebook groups, and one-on-one lesson offers from close family/friends. I'm cooking usually 3-4 nights a week now, and enjoying every second of it. Thanks for your encouragement, friends! Hopefully I'll get the courage to bust out my crock pot next week...and manage to prep a meal for it BEFORE work.

Is it Spring yet?!

Wednesday, March 6, 2013

Yummm.

Good news. My MOH Lyndsie is home from Cali for Spring break! I know right? She came to Ohio for SB?!? Well, its cause she loves me THAT much and she is throwing my first bridal shower this Saturday! 

We celebrated our birthdays together at Benihana... we were babies. Ripe age of 19.
Speaking of how awesome she is... lets talk about the fact that she ordered her MOH dress from Modcloth, it came in... and she tried it on for me last night and guess what?
IT FIT HER LIKE A GLOVE!
Did I expect anything less? Girl is teeensy.

 Switching subjects entirely...it ended up snowing here like FREAKING crazy last night up until this morning.& all I could think about is how badly I wanted to stay home, get in sweats, drink hot chocolate.. and bake something warm.

Speaking of baking....

I know quite a few of you asked for my recipe for the "Cheese Pockets" I spoke of during my random Wednesday post quite a few weeks back. SURPRISE - they don't actually have CHEESE in them.
Sorry, folks.
I happen to make these for work back in January (and last minute for a chili cook off) so you even get a couple iPhone pictures of this masterpiece creation.

Ingredients needed:

2 packages of Cream Cheese
2 tubes of Original Crescent Rolls
1 Cup of Sugar
1 Tsp Vanilla
1 Egg Yolk
1 Ugly Christmas Sweater


just kidding... but it does make baking more fun, guys.


In your blender (unless you can use a spatula and your hand, & trust me... you can't), mix together the 2 packages of cream cheese, cup of sugar, tsp of vanilla and the 1 egg yolk until blended well.

Layer first roll of crescent rolls on the bottom of a 9x13" pan (perfect fit).
Once the mixture above is blended to a smooth consistency, lather it on top of the crescent rolls in pan.

Then, once the first layer of crescent rolls are covered with the mixture, throw on the second layer of crescent rolls on top. In the meantime, make a light cinnamon/sugar mixture to sprinkle on top before sticking it in the oven for 20 minutes on 400 degrees.

After it comes out looking amazing, let it cool for about 45 minutes, then stick it in the fridge over night.

I know it doesn't look beautiful, but hey... I was in a rush ;)
Then the next morning, cut into bite size pieces (I always throw more sugar on top afterwards, duh!)

ENJOY! Let me know if you try it out!
PS- if you made it through this ridiculously random post, 4 candies for you, you go glenn coco!